Build With DocFX
Overview
This site was created with DocFx. How is this site different from our GitHub pages site for Scrapbook101? Here's how:
This DocFx site parses comments from code (under Scrapbook101core) and creates API documentation together with conceptual content (under \articles). The conceptual documentation from the GitHub pages site was reused here with few changes.
In the previous site, we used Jekyll to create the website, which contained only conceptual content. We used Jekyll to run local builds and then pushed the .md files to GitHub into a \docs folder, which we defined as a GitHub pages website. On the server, the Jekyll process would kick off automatically and create the HTML for the site.
This DocFx site relies only on DocFx. The process here is this:
- Edit locally in a working branch. This includes doc and code changes.
- Optionally run DocFx locally to test changes in both conceptual and API documentation.
- Push .md and code changes to Github remote version of local working branch.
- On GitHub create a pull request to merge working branch into master branch.
- An Azure pipeline is setup to on change in the master branch build the docs into the \docs folder of the master branch. For the master branch the \docs branch is designated as the source of GitHub pages.
The DocFx process pushes the HTML files it has created and we are not relying on Jekyll to build HTML for us.
How we got to this point is described in the following articles. This articles describes just the DocFx part. Subsequent articles describe the Azure pipeline.
Initial steps
We started by running docfx init to create a simple documentation website. We played around with that for a bit, following the walkthroughs.
After that initial simple documentation website, we started reading up on using C# XML documentation.
Then, we merged the simple documentation website structure with Scrapbook101core. Specifically, we created a \docs and \docbuild folder parallel to code folder. In the \docbuild folder, we run docfx to gather metadata and build HTML. Then as a final step, we copy the \doc\build\ _site content over to \docs.
Our local process:
- Start in root folder.
- In this case, it is the directory we cloned from GitHub, "scrapbook101core".
- Change directory to \docbuild.
- There should be a docfx.json file in the root of this folder. We copied the filed from the walkthrough.
- If you didn't start with a docfx walkthrough, you can use the
docfx initsubcommand to generate an initial docfx.json file.
- Run
docfx metadata.- This generates YAML files from source code.
- Run
docfx build.- This generates client-only website combining API in YAML files and conceptual files.
- Run
docfx --serve- This command executes the subcommands
metadataandbuildand then creates a local web server to host the pages. So the previous two steps can be skipped. They were shown just to talk about what's happening behind the scenes. - To use a different port try
docfx --serve --port=8090. - Hosting the pages is not strictly necessary. If you ran
docfx metadataanddocfx build, then at this point you can navigate to the _site folder and just open the index.html file without creating a local web server to host.
- This command executes the subcommands
- Copy all content from \docbuild\ _site to \docs.
- The copy operation is because DocFx is not integrated with GitHub Pages (issue).
- The downside of this is that we end up pushing a lot of files (HTML and supporting files).
- Commit, push changes to GitHub.
- Don't forget to check you .gitignore file and make sure _site is excluded because we'll be publishing the docs in the \docs folder.
The directory structure at the root of Scrapbook101Core looks like this:
├───docbuild
│   ├───api
│   ├───articles
│   ├───images
│   ├───obj
│   └───_site
│       ├───api
│       ├───articles
│       ├───fonts
│       └───styles
├───docs
│   ├───api
│   ├───articles
│   ├───fonts
│   ├───images
│   └───styles
└───Scrapbook101core
    ├───Assets
    ├───bin
    ├───Controllers
    ├───Models
    ├───obj
    ├───Properties
    ├───Views
    └───wwwroot
Gotchas
Some things we ran into:
When testing the walkthroughs, we used the suggested folder naming \docfx_walkthrough\docfx_project. Then, in the context of the walkthrough, we pointed to Scrapbook101core code just to see what would happen and it built fine. However, when we then created the \docbuild folder inside of Scrapbook101core and tried to run
docfx metadata, it was still looking for the \docfx_project. The culprit: Scrapbook101core\obj\xdoc\cache. We deleted the cache folder and it started working.In the process of ensuring we can always build everything from scratch, we often wipe out the .yml files in the \api folder. But be careful not to wipe out the index.md file if that is what you are pointing to in root toc.yml.
Pay attention to warnings in docfx output, they are useful.
Using the Jekyll process, we could define global site variables like Scrapbook101core, where site.sn = "Scrapbook101". With the docfx process, we haven't figured out how to do that.
Customization
Learn about templates
Starting with the advanced walkthrough as guidance, we did the following as a test:
Explore what templates are available with
docfx template list. We are interested in the default template.Export the default template with
docfx export default.- This will created a folder called _exported_templates. Either add this to .gitignore or delete after done.
In our \docbuild folder, create a templates\cust-template folder.
Change the footer template of the site to add the name of our site. So in _exported_templates\default\partials copy the footer.tmpl.partial file to docbuild\templates\cust-template\partials.
Edit the footer.tmpl.partial file to add "Scrapbook101core".
- The .templ is a Mustache template file used by renderers.
- In this simple case, it's obvious where to add the extra text "Scrapbook101core"
In the build key of docfx.json file, reference the custom template.
 "template": [
     "default",
     "templates/cust-template"
 ],
Build site and verify changes.
Perhaps a simpler way to make this change would habe been to specify the _appFooter as globalMetadata. See the below for changing _appTitle.
To add custom CSS:
Create a style folder in the cust-template folder.
Create a main.css file and put in your custom CSS.
Beyond these basics, you can get a "theme" (called Templates and Plugins) from here: https://dotnet.github.io/docfx/templates-and-plugins/templates-dashboard.html. How these themes work follows what we describe above.
Tweak reference template
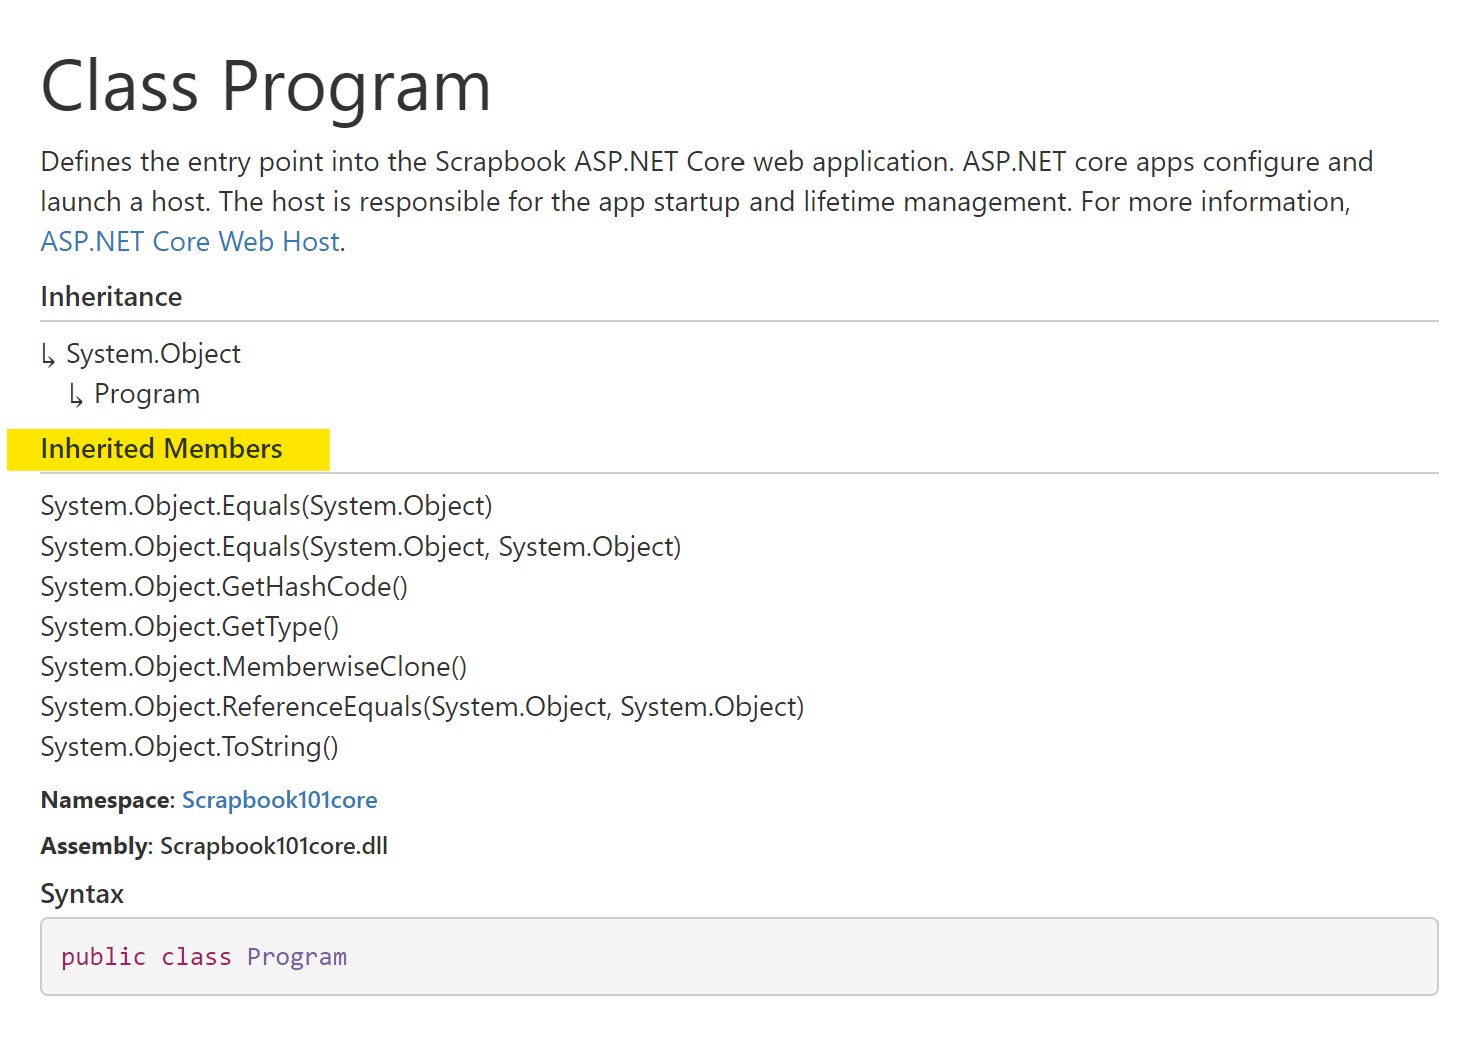
The goal is to removed the inherited members section as shown below:

Find the correct template _exported_templates\default\partials\class.header.tmpl.partial and copy to corresponding folder in \cust-templates.
Edit out the inherited members part. This is the part removed:
{{#inheritedMembers.0}}
<div class="inheritedMembers">
<h5>{{__global.inheritedMembers}}</h5>
{{/inheritedMembers.0}}
{{#inheritedMembers}}
<div>
{{#definition}}
    <xref uid="{{definition}}" text="{{nameWithType.0.value}}" alt="{{fullName.0.value}}"/>
{{/definition}}
{{^definition}}
    <xref uid="{{uid}}" text="{{nameWithType.0.value}}" alt="{{fullName.0.value}}"/>
{{/definition}}
</div>
{{/inheritedMembers}}
{{#inheritedMembers.0}}
</div>
{{/inheritedMembers.0}}
Build and verify.
Links and cross references via UID.
For example, here is a link to Code Discussion file using its UID. Here is a link to a class in the API documentation using its UID: Item. Or, we can change the text for the API link as so The Item Class. Here's the help page on linking.
Here are those links in markdown:
<xref:code-discussion>
<xref:Scrapbook101core.Models.Item>
[The Item Class](xref:Scrapbook101core.Models.Item)
How to link to a code file? Here's an full qualified path link: appsettings.json. Is there another way to do it?
Specify site title
In the docfx.json file, under the build key, specify this:
"globalMetadata" : { "_appTitle": "Scrapbook101core" },
which will add this text to the browser title of every page. The _appTitle is added to the UID of each page, so for the "Get Started" page, the title is "Get Started | Scrapbook101core". For more information on reservied metadata you can use, see reserved metadata.
Add a global variable
Our goal is to add a global variable to represent the site/product name "Scrapbook101core" so that in conceptual markdown files we could just put { { productName } } and have the build process substitute the correct value.
Here's how we achieved it. (It may not be the most elegant way.)
Export the default template with
docfx export defaultif you haven't already.- This will created a folder called _exported_templates. Either add this to .gitignore or delete after done.
In our \docbuild folder create a templates\cust-template folder, if you haven't already.
Copy the file conceptual.extension.js from _exported_templates to templates\cust-template.
Start with some simple experiments adding JavaScript code to the conceptual.extension.js file and always rebuilding.
a. For example, in the
exports.postTransformfunction add code to confirm you can see the warning line in the output when you rundocfx --serve.```javascript exports.postTransform = function (model) { console.warn("******************postprocessor******************"); return model; } ```b. Next, take a look at what the model is with:
 ```javascript
 exports.postTransform = function (model) {
     console.warn("******************postprocessor******************");
     console.warn(JSON.stringify(model));
     return model;
 }
 ```

 From the output of `docfx --serve`, copy an example of the stringified model object and put it into a .json file and format it. For a conceptual file, you should see a form something like this:

 ```json
 {
     "conceptual": "..."
     "type": "Conceptual",
     "source": {...}
     ...
 }
 ```

 From this output, you can see what you can access in the model.
In the docfx.json file put this under the "build" key:
"globalMetadata" : { "_appTitle": "Scrapbook101core", "productName": "Scrapbook101core" },Read this value from the model and use it to substitute in the model by adding this code to conceptual.extension.js:
String.prototype.replaceAll = function(search, replacement) {
    var target = this;
    return target.split(search).join(replacement);
};

exports.postTransform = function (model) {
model.conceptual = model.conceptual.replaceAll("Scrapbook101core", model["productName"] );
return model;
}
The
replaceAllfunctionality came from a suggestion in Stack Overflow. If you needed this functionality more widely, you could put the prototype function in the common.js file.
Triple-slash for properties
We started to document the Item class to understand how different tags render and what our "style" would be. For example, to document the properties, we have three useful tags:
/// <summary>
/// A summary.
/// </summary>
/// <value>
/// The property value description.
/// </value>
/// <remarks>
/// Additional information about the property.
/// </remarks>
These tags render in the order shown above, regardless of how you arrange them.
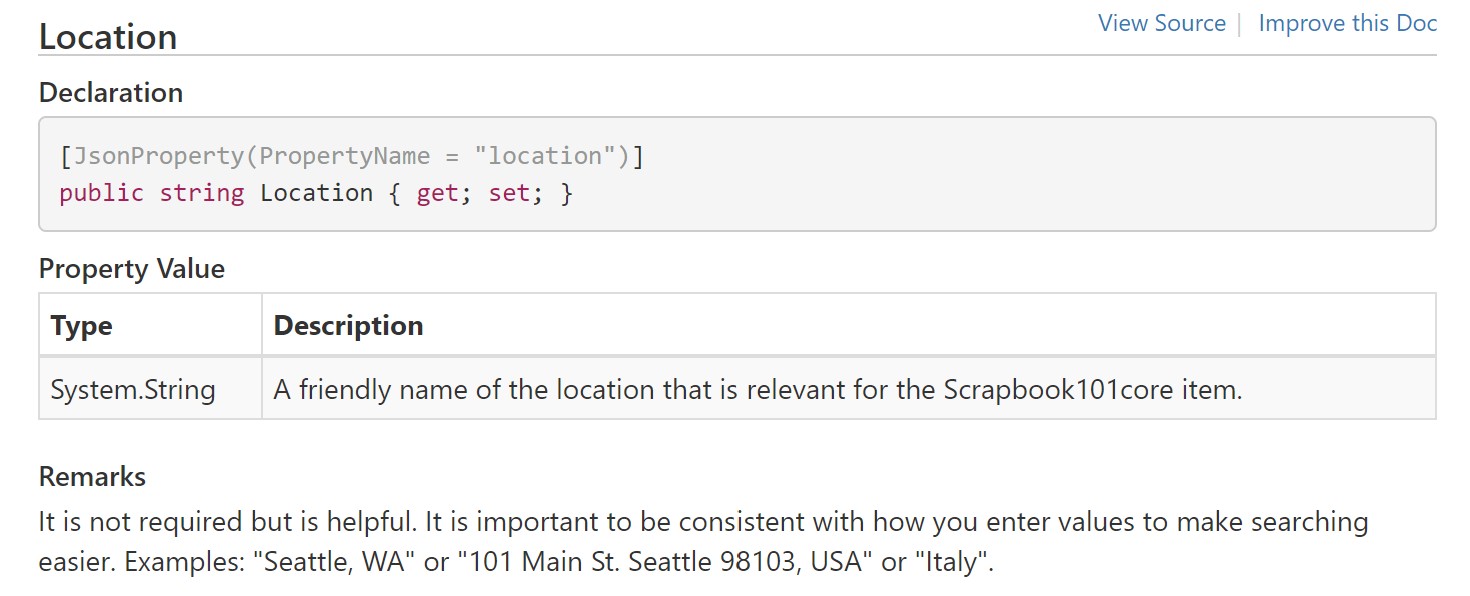
We decided that the summary tag was too much for property documentation and decided to go with just the value and remarks tags. And, the value tag would have just a short description, one to two sentences while the remarks would be any clarifying information. For example, for the Location property:
/// <value>
/// A friendly name of the location that is relevant for the Scrapbook101core item.
/// </value>
/// <remarks>
/// It is not required but is helpful. It is important to be consistent with how you enter
/// values to make searching easier.
/// Examples: "Seattle, WA" or "101 Main St. Seattle 98103, USA" or "Italy".
/// </remarks>
[JsonProperty(PropertyName = "location")]
public string Location { get; set; }
which renders as:

Next steps
The next step was to investigate Azure devops. This is discussed in the article Azure Pipeline.
Eventually, the \docs folder will be used to host the content used in GitHub Pages. In the repo settings configure Github Pages.